Difference between revisions of "Lip sync"
| Line 40: | Line 40: | ||
Next copy/paste in the audio file (should contain clear speech in English - other languages are possible, but the end results will probably not be as accurate) that you want to generate lip sync data for. The audio file can either be in wav or ogg (vorbis) format. | Next copy/paste in the audio file (should contain clear speech in English - other languages are possible, but the end results will probably not be as accurate) that you want to generate lip sync data for. The audio file can either be in wav or ogg (vorbis) format. | ||
| + | |||
| + | [[File:Lip sync 2.png|frameless|800px]] | ||
Next, you should create a new txt file & give it the same name as the audio file. Open it up & type up the content of the audio file in text format. This step is entirely optional, but it's recommended as it helps generate more accurate lip sync data. | Next, you should create a new txt file & give it the same name as the audio file. Open it up & type up the content of the audio file in text format. This step is entirely optional, but it's recommended as it helps generate more accurate lip sync data. | ||
Revision as of 18:14, 16 October 2018
| Name | By |
|---|---|
| How to generate lip sync files with Rhubarb Lip Sync & use them in Visionaire Studio (animation, tsv files) | AFRLme |
This tutorial will show you how to setup Rhubarb Lip Sync, how to generate lip sync files from an audio recording containing speech, & how to make your talk animations lip sync ready.
Tutorial
Installing Rhubarb Lip Sync
First things first, you will need to download the latest version of Rhubarb Lip Sync. You can find it here.
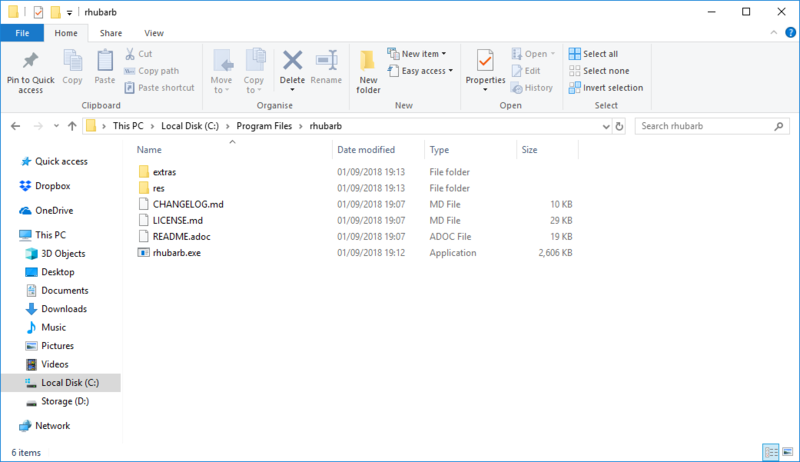
Once you have downloaded the latest version of Rhubarb, you should navigate to c:/program files & create a new folder. Rename the new folder rhubarb. Now open up the zip file containing the latest version of Rhubarb & drag the contents into the rhubarb folder you just created.
Now minimize or close all open windows & double click on my pc/my computer; or whatever it is called on your pc. Wait for the window to open up & then right click somewhere where there is empty space, then click on properties. On the next window that opens up, click on advanced system settings, then click on environment variables on the next window that pops up.
Now you need to locate & select path found under system variables. Once you have done that, click on the edit button. Another window will pop up. Click on the new button & type C:/Program Files/rhubarb/ into the new entry that you just created, then click on the ok button. That's all there is to setting up Rhubarb Lip Sync on Windows. Close all the windows & you are done.
Using Rhubarb Lip Sync
Assuming you have installed Rhubarb Lip Sync, it's now time to generate your first tsv lip sync file - but first, what is a tsv file? tsv stands for tab separated values. It consists of a timestamp (in seconds) followed by a mouth shape letter or an animation frame number. It will look a little something like this...
| 0.00 | X |
| 0.67 | B |
| etc. | etc. |
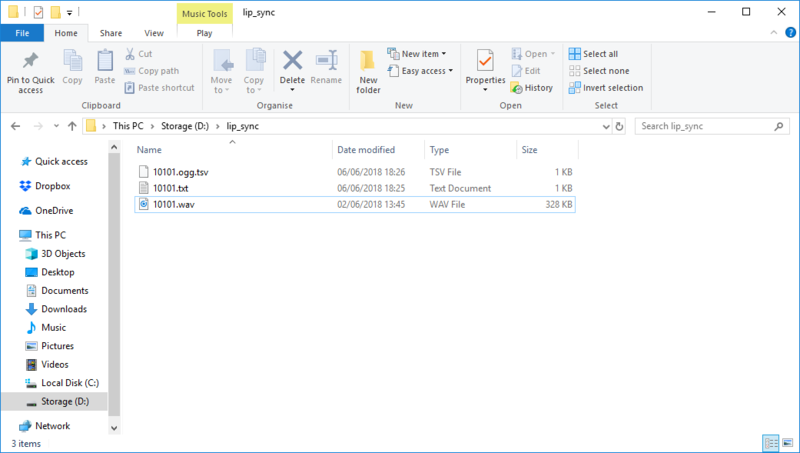
Anyway, moving on... create a new folder somewhere on your pc & name it "lip_sync" - it should be somewhere that's easy to access; in my case, I created it on the D drive @ d:\lip_sync\.
Next copy/paste in the audio file (should contain clear speech in English - other languages are possible, but the end results will probably not be as accurate) that you want to generate lip sync data for. The audio file can either be in wav or ogg (vorbis) format.
Next, you should create a new txt file & give it the same name as the audio file. Open it up & type up the content of the audio file in text format. This step is entirely optional, but it's recommended as it helps generate more accurate lip sync data.
Once you have done that, it's time to open up Rhubarb. Press ⌘+R to open up the Run dialog box.
Once you have found a recording you like, copy/paste it into the lip_sync folder that you created earlier. Next, right click somewhere in the lip_sync folder & create a new text file. Give it the same name as the audio file you just pasted in. Now open up the text file & create a typed up version of whatever is being said in the audio recording - the text file is used to generate more accurate lip sync data.
Now we need to open up Rhubarb Lip Sync. To do that we need to run it, so, press windows key + r key to open up run, then type cmd & then press enter.
Here comes the fun ~technical~ part. If you did not create the lip_sync folder on the C drive, then you will need to change to the drive where you installed it - in my case I created it here: d:\lip_sync\, so I need to type d: then press enter, then type cd d:\lip_sync\ to set the current folder to lip_sync.
| Quick note: the tsv lip sync files can contain either the mouth shape letters or animation frame numbers, so feel free to edit the tsv files & use numbers instead if you want to go beyond basic lip sync animations - maybe your characters contain animations for a wide range of emotions, or you want the head to face a different direction to the body, etc. |
Resources
| Name | Description |
|---|---|
| mask_example.zip | A working .ved file, complete with resources. Check out the readme.txt file for instructions. |

