Difference between revisions of "Lip sync"
m |
|||
| (11 intermediate revisions by the same user not shown) | |||
| Line 8: | Line 8: | ||
This tutorial will show you how to setup [https://github.com/DanielSWolf/rhubarb-lip-sync Rhubarb Lip Sync], how to generate lip sync files from an audio recording containing speech, & how to make your talk animations lip sync ready. | This tutorial will show you how to setup [https://github.com/DanielSWolf/rhubarb-lip-sync Rhubarb Lip Sync], how to generate lip sync files from an audio recording containing speech, & how to make your talk animations lip sync ready. | ||
| − | Now, before you even consider using Rhubarb, you will need to create talk animations that represent | + | Now, before you even consider using Rhubarb, you will need to create talk animations that represent the mouth shapes in the table below. The animation frames should be ordered like so: A = 1, B = 2, C = 3, D = 4, E = 5, F = 6, G = 7, H = 8, X = 9. ''The table below is from the official Rhubarb GitHub page.'' |
{| class="ts" style="width:100%" | {| class="ts" style="width:100%" | ||
| Line 36: | Line 36: | ||
This extended mouth shape is optional. Depending on your art style and the angle of the head, the tongue may not be visible at all. In this case, there is no point in drawing this extra shape. If you decide not to use it, you can specify so using the extendedShapes option. | This extended mouth shape is optional. Depending on your art style and the angle of the head, the tongue may not be visible at all. In this case, there is no point in drawing this extra shape. If you decide not to use it, you can specify so using the extendedShapes option. | ||
|- | |- | ||
| − | | style="text-align:center; vertical-align:middle;" | <span style="font-size:20px;"> | + | | style="text-align:center; vertical-align:middle;" | <span style="font-size:20px;">Ⓧ</span> || [[File:Lisa-X.png|frameless|122px|link=]] || Idle position. This mouth shape is used for pauses in speech. This should be the same mouth drawing you use when your character is walking around without talking. It is almost identical to <span style="font-size:16px;">Ⓐ</span>, but with slightly less pressure between the lips: For <span style="font-size:16px;">Ⓧ</span>, the lips should be closed but relaxed. |
This extended mouth shape is optional. Whether there should be any visible difference between the rest position <span style="font-size:16px;">Ⓧ</span> and the closed talking mouth <span style="font-size:16px;">Ⓐ</span> depends on your art style and personal taste. If you decide not to use it, you can specify so using the extendedShapes option. | This extended mouth shape is optional. Whether there should be any visible difference between the rest position <span style="font-size:16px;">Ⓧ</span> and the closed talking mouth <span style="font-size:16px;">Ⓐ</span> depends on your art style and personal taste. If you decide not to use it, you can specify so using the extendedShapes option. | ||
| + | |} | ||
| + | |||
| + | {| class="ts" style="width:100%" | ||
| + | |- | ||
| + | | ''Quick note #1: the tsv lip sync files can contain either the mouth shape letters or animation frame numbers, so feel free to edit the tsv files & use numbers instead if you want to go beyond basic lip sync animations - maybe your characters contain animations for a wide range of emotions, or you want the head to face a different direction than where the body is facing, etc.'' | ||
| + | |- | ||
| + | | ''Quick note #2: Rhubarb can generate lip sync data from both wav & ogg (vorbis) audio file formats.'' | ||
| + | |- | ||
| + | | ''Quick note #3: Visionaire Studio automatically looks for tsv files with the same name as the currently playing speech audio file, so all you need to do is make sure that the tsv file has the same name as the audio file & is in the same folder.'' | ||
|} | |} | ||
| Line 75: | Line 84: | ||
Next, you should create a new txt file & give it the same name as the audio file. Open it up & type up the content of the audio file in text format. | Next, you should create a new txt file & give it the same name as the audio file. Open it up & type up the content of the audio file in text format. | ||
| + | |||
{| class="ts" style="width:100%" | {| class="ts" style="width:100%" | ||
|- | |- | ||
| − | | ''Quick note: this step is entirely optional, but it is recommended | + | | ''Quick note: this step is entirely optional, but it is highly recommended as it helps Rhubarb generate more accurate lip sync data.'' |
|} | |} | ||
| + | [[File:Lip sync 3.png|frameless|800px]] | ||
| − | [[File:Lip sync | + | Once you have done that, it's time to open up Rhubarb. Press <kbd>⊞</kbd>+<kbd>R</kbd> to open up the '''Run''' dialog box. |
| + | |||
| + | & now comes the technical mumbo-jumbo part... by default Rhubarb will use all of the available mouth shapes, A-H, & X for pauses in the audio, but G, H & X mouth shapes are entirely optional. | ||
| + | |||
| + | Let's start off with generating a lip sync tsv file with the default settings - but,first, before we can do that, we need to make sure that the correct location is set in the command prompt window. In my case I created the '''lip_sync''' folder under '''d:\lip_sync\''', so for me to specify that location I needed to type... | ||
| + | d: | ||
| + | followed by... | ||
| + | cd d:\lip_sync\ | ||
| + | into the command prompt window & I ended up with something like this... | ||
| + | |||
| + | [[File:Lip sync 4.png|frameless|800px]] | ||
| − | + | Now that we have specified the location where we have stored the audio files that we want to generate lip sync data for, we are now ready to use Rhubarb. As you can see in the screenshot before last, the '''lip_sync''' folder contains a wav file called 10101 & a txt file with the same name. Type something along the lines of this into the command prompt window... | |
| + | rhubarb -o 10101.ogg.tsv -d 10101.txt 10101.wav | ||
| + | Ok, so what have we just typed? Let's break it down shall we? | ||
| + | rhubarb -o output_file -d speech_transcript input_file | ||
{| class="ts" style="width:100%" | {| class="ts" style="width:100%" | ||
|- | |- | ||
| − | | ''Quick note | + | | ''Quick note: you can choose which extended mouth shapes to use by including the --extendedShapes option in the command prompt window, but be aware that if you omit mouth shapes that you will need to manually edit the tsv files to replace all instances of X (if included) with the relevant animation frame number instead of X). |
| − | + | ||
| − | + | Here is a quick example of extendedShapes being used (h is omitted)... | |
| + | rhubarb -o 10101.ogg.tsv -d 10101.txt --extendedShapes GX 10101.wav'' | ||
|} | |} | ||
| + | |||
| + | The final step is to copy/move the tsv file you just generated into the same folder as the speech audio file that you will be using in Visionaire Studio. & voila, you are done! | ||
| Line 102: | Line 129: | ||
! style="text-align:left" | Name !! style="text-align:left" | Description | ! style="text-align:left" | Name !! style="text-align:left" | Description | ||
|- | |- | ||
| − | | [[media: | + | | [[media:Lip_sync_demo_(fixed).zip|lip_sync_demo_(fixed).zip]] || A working .ved file, complete with resources. Check out the readme.txt file for instructions. |
|}{{toc}} | |}{{toc}} | ||
Latest revision as of 23:45, 1 May 2022
| Name | By |
|---|---|
| How to generate lip sync files with Rhubarb Lip Sync & use them in Visionaire Studio (animation, tsv files) | AFRLme |
This tutorial will show you how to setup Rhubarb Lip Sync, how to generate lip sync files from an audio recording containing speech, & how to make your talk animations lip sync ready.
Now, before you even consider using Rhubarb, you will need to create talk animations that represent the mouth shapes in the table below. The animation frames should be ordered like so: A = 1, B = 2, C = 3, D = 4, E = 5, F = 6, G = 7, H = 8, X = 9. The table below is from the official Rhubarb GitHub page.
| Ⓐ | 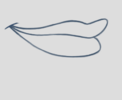 |
Closed mouth for the “P”, “B”, and “M” sounds. This is almost identical to the Ⓧ shape, but there is ever-so-slight pressure between the lips. |
| Ⓑ | 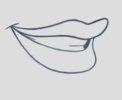 |
Slightly open mouth with clenched teeth. This mouth shape is used for most consonants (“K”, “S”, “T”, etc.). It’s also used for some vowels such as the “EE” sound in bee. |
| Ⓒ |  |
Open mouth. This mouth shape is used for vowels like “EH” as in men and “AE” as in bat. It’s also used for some consonants, depending on the context.
This shape is also used as an in-between when animating from Ⓐ or Ⓑ to Ⓓ. So make sure the animations ⒶⒸⒹ and ⒷⒸⒹ look smooth! |
| Ⓓ | 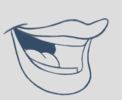 |
Wide open mouth. This mouth shapes is used for vowels like “AA” as in father. |
| Ⓔ |  |
Slightly rounded mouth. This mouth shape is used for vowels like “AO” as in off and “ER” as in bird.
This shape is also used as an in-between when animating from Ⓒ or Ⓓ to Ⓕ. Make sure the mouth isn’t wider open than for Ⓒ. Both ⒸⒺⒻ and ⒹⒺⒻ should result in smooth animation. |
| Ⓕ | 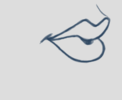 |
Puckered lips. This mouth shape is used for “UW” as in you, “OW” as in show, and “W” as in way. |
| Ⓖ | 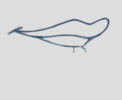 |
Upper teeth touching the lower lip for “F” as in for and “V” as in very.
This extended mouth shape is optional. If your art style is detailed enough, it greatly improves the overall look of the animation. If you decide not to use it, you can specify so using the extendedShapes option. |
| Ⓗ | 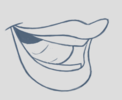 |
This shape is used for long “L” sounds, with the tongue raised behind the upper teeth. The mouth should be at least far open as in Ⓒ, but not quite as far as in Ⓓ.
This extended mouth shape is optional. Depending on your art style and the angle of the head, the tongue may not be visible at all. In this case, there is no point in drawing this extra shape. If you decide not to use it, you can specify so using the extendedShapes option. |
| Ⓧ | 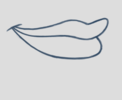 |
Idle position. This mouth shape is used for pauses in speech. This should be the same mouth drawing you use when your character is walking around without talking. It is almost identical to Ⓐ, but with slightly less pressure between the lips: For Ⓧ, the lips should be closed but relaxed.
This extended mouth shape is optional. Whether there should be any visible difference between the rest position Ⓧ and the closed talking mouth Ⓐ depends on your art style and personal taste. If you decide not to use it, you can specify so using the extendedShapes option. |
| Quick note #1: the tsv lip sync files can contain either the mouth shape letters or animation frame numbers, so feel free to edit the tsv files & use numbers instead if you want to go beyond basic lip sync animations - maybe your characters contain animations for a wide range of emotions, or you want the head to face a different direction than where the body is facing, etc. |
| Quick note #2: Rhubarb can generate lip sync data from both wav & ogg (vorbis) audio file formats. |
| Quick note #3: Visionaire Studio automatically looks for tsv files with the same name as the currently playing speech audio file, so all you need to do is make sure that the tsv file has the same name as the audio file & is in the same folder. |
Tutorial
Installing Rhubarb Lip Sync
First things first, you will need to download the latest version of Rhubarb Lip Sync. You can find it here.
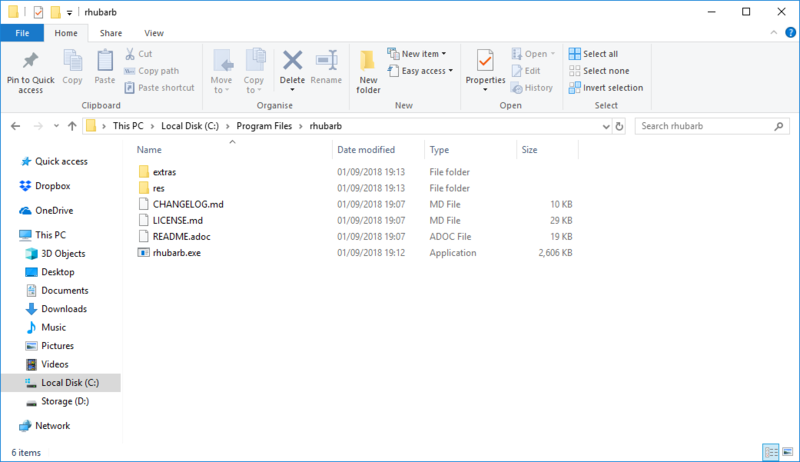
Once you have downloaded the latest version of Rhubarb, you should navigate to c:/program files & create a new folder. Rename the new folder rhubarb. Now open up the zip file containing the latest version of Rhubarb & drag the contents into the rhubarb folder you just created.
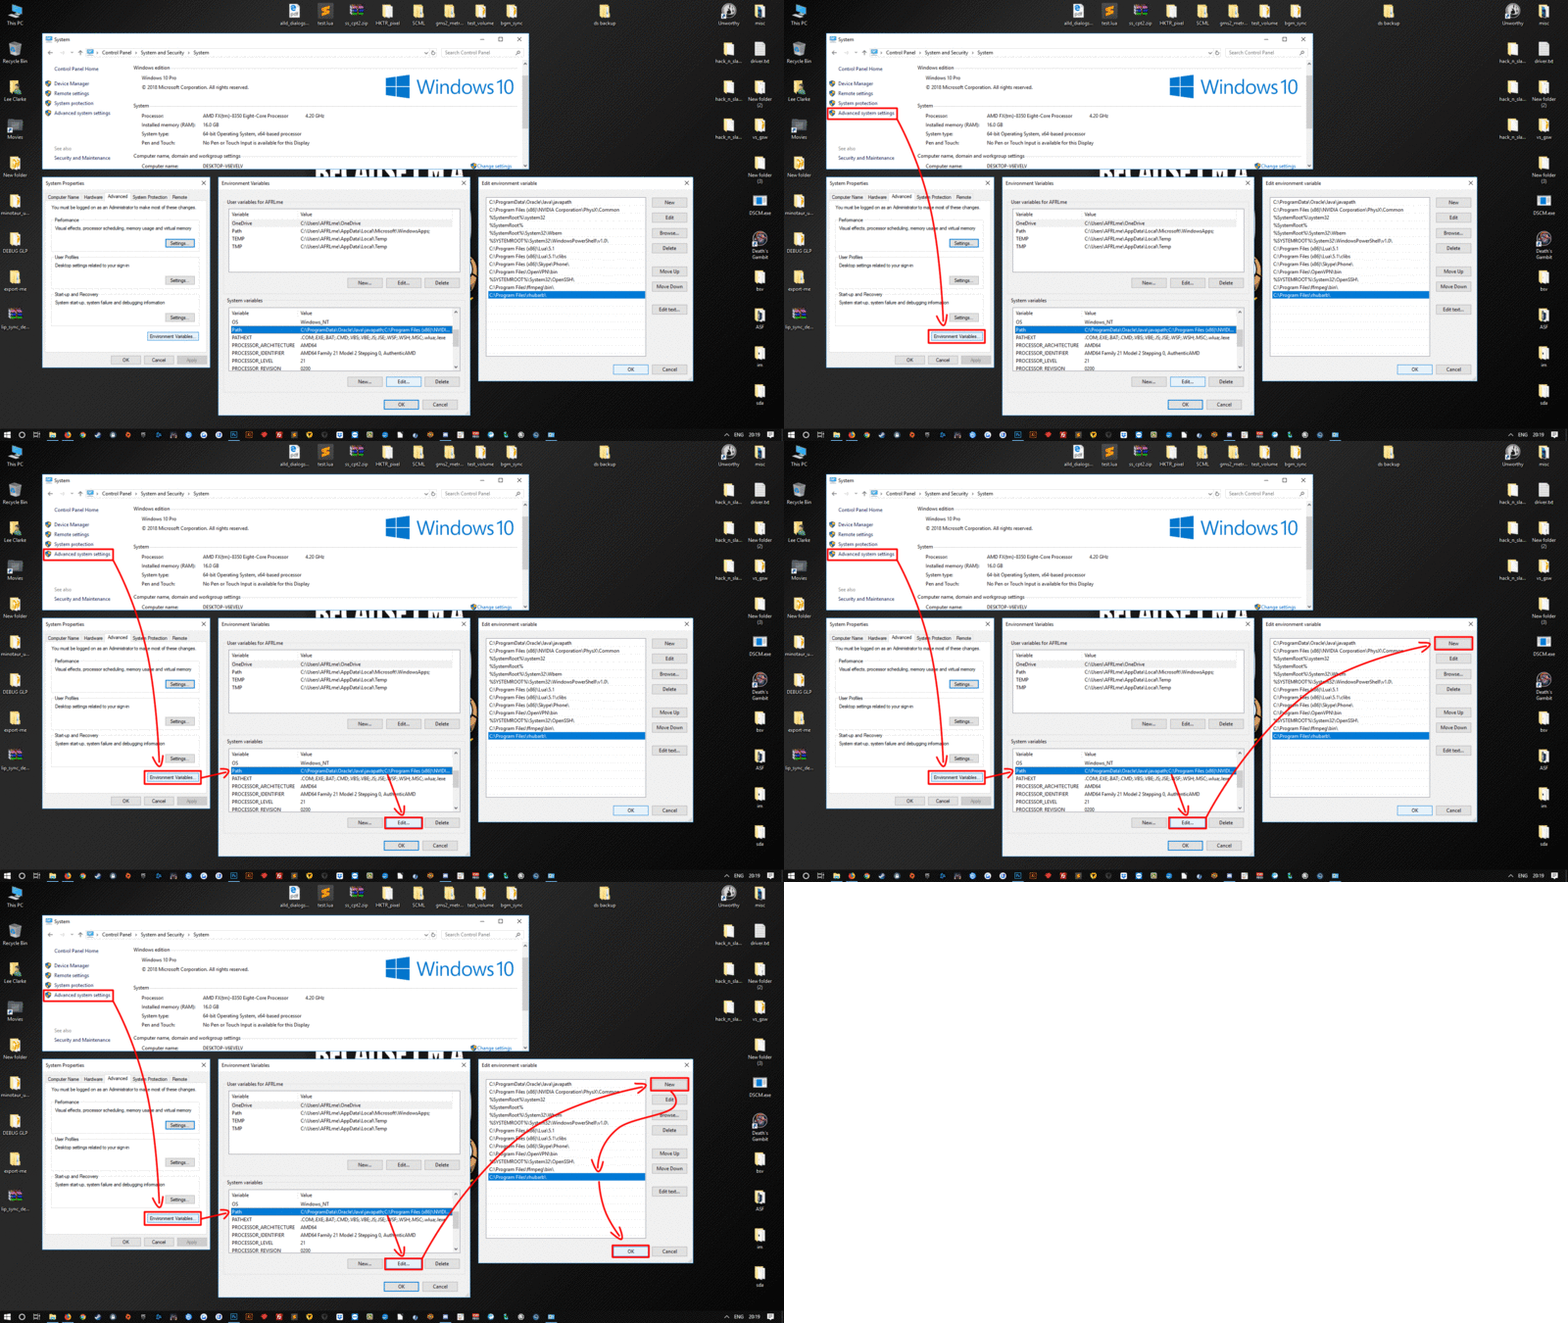
Now navigate to: control panel > system & security > system, & then click on advanced system settings. Now click on environment variables then find & select path under system variables & then click on the edit button. Click on the new button & type C:\Program Files\rhubarb\ into the new field you just created. Hit the ok button & you are all done. Congratulations, you just successfully installed Rhubarb Lip Sync.
Using Rhubarb Lip Sync
Assuming you have installed Rhubarb Lip Sync, it's now time to generate your first tsv lip sync file - but first, what is a tsv file? tsv stands for tab separated values. It consists of a timestamp (in seconds) followed by a mouth shape letter or an animation frame number. It will look a little something like this...
| 0.00 | X |
| 0.67 | B |
| etc. | etc. |
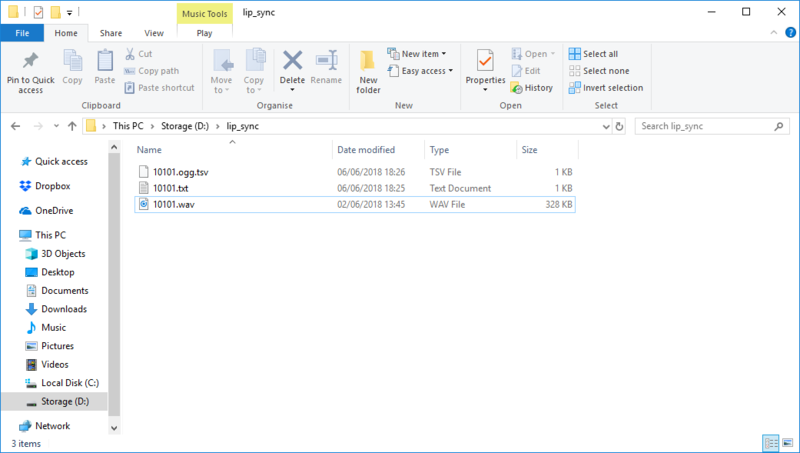
Anyway, moving on... create a new folder somewhere on your pc & name it "lip_sync" - it should be somewhere that's easy to access; in my case, I created it on the D drive @ d:\lip_sync\.
Next copy/paste in the audio file (should contain clear speech in English - other languages are possible, but the end results will probably not be as accurate) that you want to generate lip sync data for.
Next, you should create a new txt file & give it the same name as the audio file. Open it up & type up the content of the audio file in text format.
| Quick note: this step is entirely optional, but it is highly recommended as it helps Rhubarb generate more accurate lip sync data. |
Once you have done that, it's time to open up Rhubarb. Press ⊞+R to open up the Run dialog box.
& now comes the technical mumbo-jumbo part... by default Rhubarb will use all of the available mouth shapes, A-H, & X for pauses in the audio, but G, H & X mouth shapes are entirely optional.
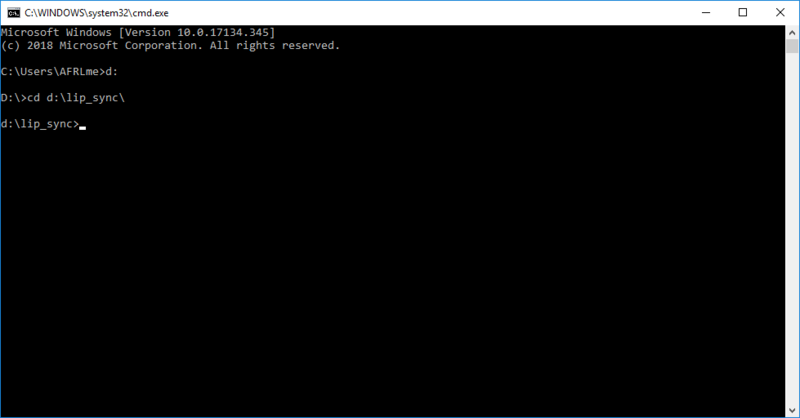
Let's start off with generating a lip sync tsv file with the default settings - but,first, before we can do that, we need to make sure that the correct location is set in the command prompt window. In my case I created the lip_sync folder under d:\lip_sync\, so for me to specify that location I needed to type...
d:
followed by...
cd d:\lip_sync\
into the command prompt window & I ended up with something like this...
Now that we have specified the location where we have stored the audio files that we want to generate lip sync data for, we are now ready to use Rhubarb. As you can see in the screenshot before last, the lip_sync folder contains a wav file called 10101 & a txt file with the same name. Type something along the lines of this into the command prompt window...
rhubarb -o 10101.ogg.tsv -d 10101.txt 10101.wav
Ok, so what have we just typed? Let's break it down shall we?
rhubarb -o output_file -d speech_transcript input_file
| Quick note: you can choose which extended mouth shapes to use by including the --extendedShapes option in the command prompt window, but be aware that if you omit mouth shapes that you will need to manually edit the tsv files to replace all instances of X (if included) with the relevant animation frame number instead of X).
Here is a quick example of extendedShapes being used (h is omitted)... rhubarb -o 10101.ogg.tsv -d 10101.txt --extendedShapes GX 10101.wav |
The final step is to copy/move the tsv file you just generated into the same folder as the speech audio file that you will be using in Visionaire Studio. & voila, you are done!
Reference Video
Resources
| Name | Description |
|---|---|
| lip_sync_demo_(fixed).zip | A working .ved file, complete with resources. Check out the readme.txt file for instructions. |
