Difference between revisions of "Dynamic Character Blinking (h2)"
| Line 11: | Line 11: | ||
== Tutorial == | == Tutorial == | ||
| − | 1. First | + | 1. First I started off by attaching the blink animation to the end of each of the idle animations & then I edited the first frame of each of the idle animations & created an execute a script action part containing... |
| + | <syntaxhighlight> | ||
| + | if math.random(20) < 13 then | ||
| + | ActiveAnimations["animation_name"].AnimationLastFrame = 16 | ||
| + | else | ||
| + | ActiveAnimations["animation_name"].AnimationLastFrame = 21 | ||
| + | end | ||
| + | </syntaxhighlight> | ||
| + | ... Why have I used these these values for the AnimationLastFrame value? Well, it's because my regular idle animation is 16 frames in total & the blink frames I attached to the end of the regular idle animation consisted of 5 frames making a grand total of 21 frames. Now the idea behind this is that we are querying the math.random value to see if we should play up to frame 16 or play the entire animation, thus depending on the value returned by math.random, our character either blinks or it does not on each animation loop. | ||
| − | [[File: | + | Quick note: in the second screenshot below I have actually gone a step further as I have attached some extra blink animation frames to allow the character to blink once, twice or not at all as I believe it furthers enhances the dynamic of the character in general. |
| + | |||
| + | [[File:blink_screen_code.png|400px]] [[File:blink_screen_code_(2).png|400px]] | ||
2. Next thing you want to do is create a button inside of one of your interfaces & set the '''button type''' to '''action area'''. | 2. Next thing you want to do is create a button inside of one of your interfaces & set the '''button type''' to '''action area'''. | ||
Revision as of 14:39, 5 August 2016
| Name | By |
|---|---|
| Dynamic Character Blinking (animation, Lua) | AFRLme |
This tutorial shows you how to create dynamic blinking for your characters using some if queries & a little bit of Lua script to force which animation frames should show. This tutorial only delves into the basics of adding a blinking animation to your characters idle animations, however you could quite easily use the same method to insert blink animations anywhere you like in any of your characters animations by querying which frames should be played or skipped.
Tutorial
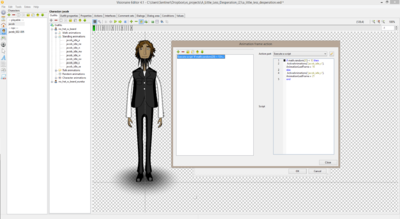
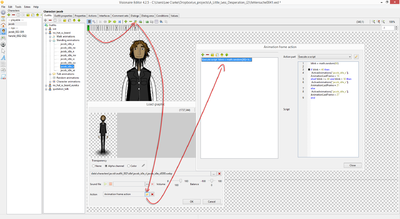
1. First I started off by attaching the blink animation to the end of each of the idle animations & then I edited the first frame of each of the idle animations & created an execute a script action part containing...
if math.random(20) < 13 then
 ActiveAnimations["animation_name"].AnimationLastFrame = 16
else
 ActiveAnimations["animation_name"].AnimationLastFrame = 21
end
... Why have I used these these values for the AnimationLastFrame value? Well, it's because my regular idle animation is 16 frames in total & the blink frames I attached to the end of the regular idle animation consisted of 5 frames making a grand total of 21 frames. Now the idea behind this is that we are querying the math.random value to see if we should play up to frame 16 or play the entire animation, thus depending on the value returned by math.random, our character either blinks or it does not on each animation loop.
Quick note: in the second screenshot below I have actually gone a step further as I have attached some extra blink animation frames to allow the character to blink once, twice or not at all as I believe it furthers enhances the dynamic of the character in general.
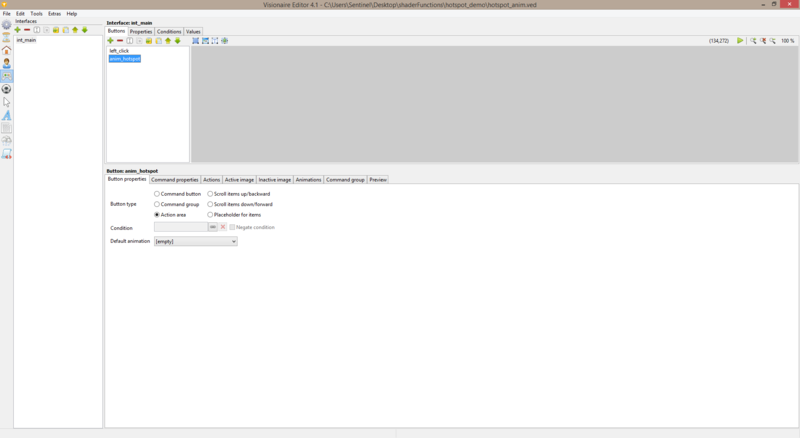
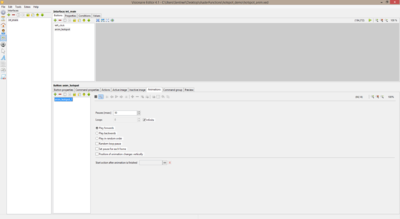
2. Next thing you want to do is create a button inside of one of your interfaces & set the button type to action area.
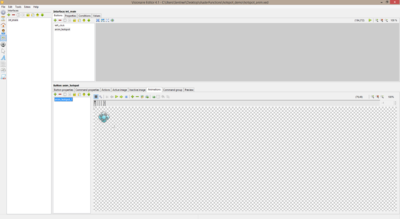
3. Create your hotspot animations inside of this button & adjust properties settings for each animation to suit.
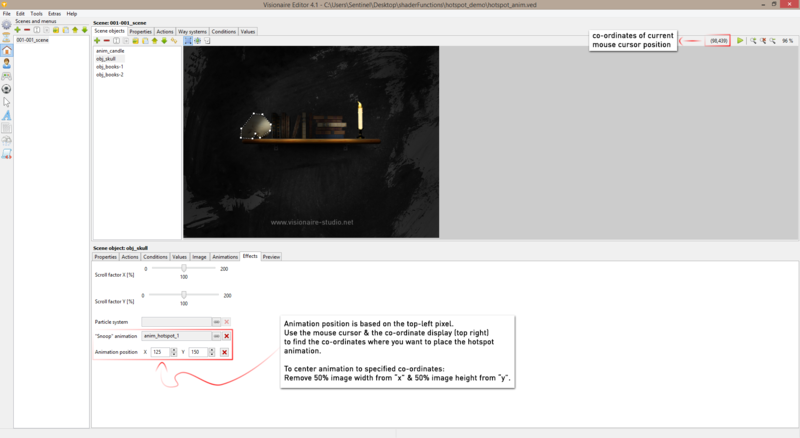
4. Next you need to assign your hotspot animations to each of your scene objects & position them on the screen via the effects tab.
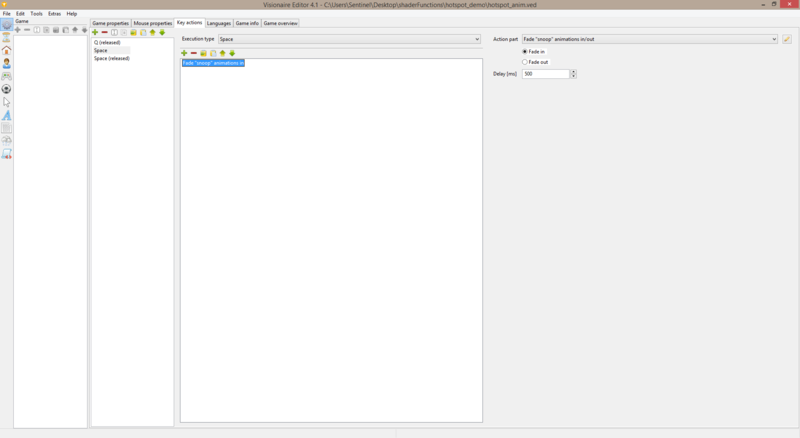
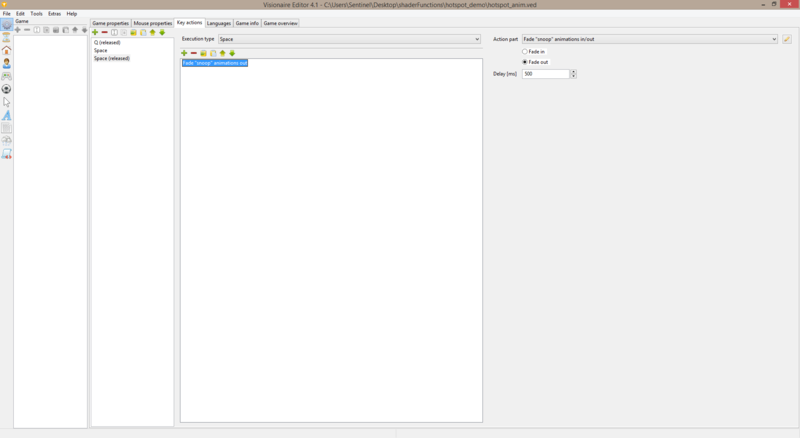
5. Now you need to go to game tab > key actions to sort out the key inputs that will toggle the hotspots animations on/off.
6. Create a space key action & inside of this create a scene > fade "snoop" animations in action part.
7. Create a space (released) key action & inside of this create a scene > fade "snoop" animations out action part.
8. Now rinse & repeat the process for all the other scene objects that you want to show hotspot animations for.
Resources
| Name | Description |
|---|---|
| hotspot_demo.zip | A working .ved file, complete with resources. Check out the readme.txt file for instructions. |
