Characters
Each game created with Visionaire Studio needs to have at least one character added to it. Otherwise the game won't start. Even if you are heading for a first-person adventure, you have to add a character – you would just keep it invisible.
In most cases point-&-click adventure games feature (visible) characters though. You can add as many characters as you like in the "Characters" section of the editor. One of the characters is playable, meaning the user controls that character: walking him around, doing things, using his inventory items etc. In the game properties you define which character will be active on game start. Each character can become active/playable; you can switch through the "Change character" action part.
Characters which are currently not playable are referred to as NPCs (non-playable characters) on this page, the playable character as PC.
Character properties
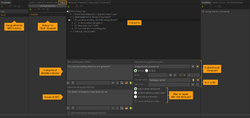
Define general settings for a character on the "Properties" tab (see image):
- Name: Enter the name of the character as it should appear in the game. This only makes sense for NPCs, whose names become part of the action text.
- Walking sound: Link a sound file to be played continuously while the character is walking. It is recommended though to add footstep sounds to individual frames of the walking animation instead, because it lets you synchronize sound and movement much better.
- Outfit: Select the initial outfit of the character. You can change the outfit during the game via an action part.
- Character stands at: Select a scene object for the initial positioning of the character. Make sure the object has a position defined.
- Position for executing an action: You can add actions for interacting with an NPC (Look at him, talk to him etc.). If "Execution at destination" is selected as execution type, the PC will walk to the NPC and perform the action once he reaches him – it's just like interacting with scene objects. Unlike objects, characters tend to change their position during the game, so the Visionaire player usually has to determine whether the PC has reached the NPC by calculating the distance between them (based on the NPC's size). That calculation may not be good enough for you, so in case your NPC does not move at all but stays at a certain position, you better define a position which serves as the destination point for the PC.
- Scale character/Scale factor [%]: Check the scale option, if you want the character to be affected by the scaling settings of waypoints. You can also set an initial scaling factor which will be added on top of the waypoint scaling.
- Font: Select the font for character text spoken by this character.
- Dialog selection font (inactive): Select the font used for the dialog lines you can select from during a dialog.
- Dialog selection font (active): Select the font used when hovering over a dialog line option.
- Cursor for dialog selection: Select the cursor used to select dialog lines during a dialog.
- Comment set: Select the initial comment set used by the character.
- Speech bus: tbd
- Harmonize walk animations: tbd
- Dialog selection font (inactive, used): Select the font used for the dialog lines you can select from – and already picked before – during a dialog.
- Dialog selection font (active, used): Select the font used when hovering over a dialog line option you already picked before.
Outfits
Each character can have mutliple outfits (at least one). An outfit is a set of animations and settings which define the visual appearance of that character. If a character changes his look during the game (changes clothes, puts on nose glasses, turns into a werewolf etc.), you can simply change his outfit through the "Change outfit" action part.
General outfit settings
You can name each outfit to your liking. This is just an internal name. Selecting the outfit in the list of outfits opens the settings panel (see image, where the outfit has been named "Normal").
- The Minumum/Maximum time between random animation defines how often random character animations are played.
- The Walking speed defines the speed of the character when using sliding walk animations.
- Check the "Sliding walk animation" option to use the classic way of character movement.
- Add a 3D model file, if you want to use this kind of animation. Read more about 3D character models.
- Add Spine files, if you want to use this kind of animation. Read more about spine character animations.
Animations
Each outfit contains several animation groups (see image in previous chapter):
- Walk animations are automatically played when the character is walking.
- Standing animations are automatically played when the character is standing doing nothing. These animations often contain only a single frame, but they could also show the character breathing or blinking, for example.
- Talk animations are automatically played when the character is talking, i. e. a character text is (dis)played.
- Random animations are played randomly from time to time whenever the character is doing nothing. The frequency (minimum/maximum time) can be defined through the outfit settings.
- Character animations are individual animations which are only played if started through the "Play animation" action part.
- Turn animations are special walk animations. They "connect" animations for different directions with each other, thus adding a "smooth" turn when the chracater changes directions. Unlike walk animations, which are mandatory for walkable characters, turn animations are optional.
Each animation group may contain several animations. For example, the "Walk animations" group usually contains multiple animations for the different directions a character can walk. The same goes for the other groups. The Visionaire player chooses which animation to play, based on what the character is currently doing (standing, walking, talking etc.) and which direction he is facing. Only one animation per character is played at a time.
Image sequence animations
The "classic" way of creating character animations is using sequences of .png or .webp image files. If you add an animation to one of the animation groups described above, you'll get an animation editor where you can add and configure your animation frames. See the Animations page for more on setting up animations in Visionaire Studio.
Some animation features only apply to character animations and are not covered on the aforementioned general animations page:
- In the animation properties you have to define the Direction of animation through the compass widget. As said before, the Visionaire player decides which animation to play based on the direction the character is facing. So in a third-person adventure game, your PC will most likely have 4 or 8 (or even more) different walking animations – each for a different walking direction. The same goes for the other animation groups.
- For turn animations you have to define a second Direction of animation as these animations "connect" two facing directions.
- If your character looks more or less symmetrical, you can easily create e. g. a left-headed animation by simply mirroring the right-headed animation (or vice versa). Just select which animation to mirror through the "Mirror following animation" setting in the animation properties.
Harmonize animations
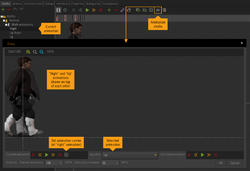
To make sure the character doesn't change his position abruptly when the Visionaire player switches animations, you have to harmonize them, meaning the animation centers of all the different animations should match. The "Animation Studio" helps you to achieve this: Click the eye icon (see image) to open a dialog window that shows the current animation. On the bottom you can select a second animation to adjust to. Both animations will be placed on top of each other. Enable the animation center icon and move the current animation until it matches the second selected animation.
Walk animations: To slide or not to slide
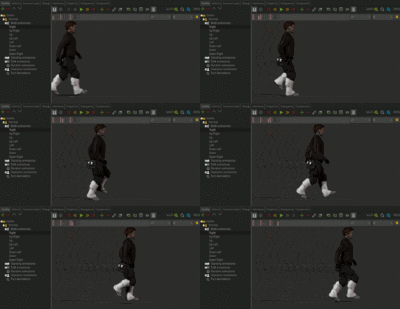
The default way of character moving is the "sliding walk". The Visionaire player loops the walking animation while moving the whole animation through the scene at a certain speed. That Walking speed is defined in the outfit settings.
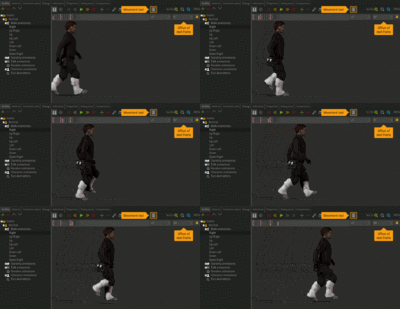
The "sliding walk" may work for your game, and setting it up is quite easy. But it usually looks like the character is rather floating than walking as there is no real connection between the walk cycle and the character touching the ground. If you want to make it look more realistic, you can try the advanced approach. Uncheck the "Sliding walk animation" option in the outfit settings. Without changing anything else, the walk will now look kind of "stiff" or "unsmooth" (and definitely not better than before). In the animation editor enable the movement tool (footprints icon). You can now enter the amount of pixels by which each of the animation frames will "move forward". Getting a good result needs a bit of fiddling though. The animated images show the different results of the two approaches.
Animation index
It is possible to have multiple animations for the same direction in the same animation group: by default, the Visionaire player will play the first one it can find. For example: if you have two animations for the character walking to the right, the first one in the list will be used. If you want the second one to play, you have to change the animation index through the "Change character animation index" action part.
3D models
Visionaire Studio supports animated 3D models.
tbd
Spine files
Visionaire Studio supports animation files created with Spine 2D animation software.
tbd
Dialogs
Talking to another character may lead to a conversation, during which the user has to decide what to say by choosing a line of text for the PC. These conversations are called "Dialogs" in Visionaire Studio.
Dialog area
Before being able to start a dialog you have to set up the dialog area of the PC. That's an interface-like overlay which holds the selection of dialog lines to pick from.
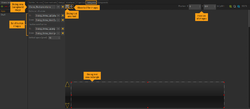
You can add up to five images: the dialog area background image and four images for buttons/arrows to scroll the dialog lines up and down – both in an inactive and active/highlighted state (see image). Activate the move tool (four-arrows icon) above the viewport and drag the images to their positions. You can also enter coordinates. The scrolling function and the highlighting on hover are done automatically by the engine. Scrolling via the scroll wheel is also enabled.
Activate the dialog text area tool ([T] icon) and drag a rectangle onto your background. This is where the Visionaire player will place the dialog selection. You can define the Vertical space to keep between the dialog options. The fonts used for the dialog selection are defined in the character properties.
Set up a dialog
You add a dialog on the "Dialogs" tab of the NPC you are talking to – not on the "Dialogs" tab of the PC. Name it to your liking.
Dialog tree structure
Dialogs are arranged in a tree structure consisting of different layers or levels (see image). All dialog parts/options on the same level make up a selection of dialog lines offered to the user. If you start the dialog shown in the example image, the dialog area will show the lines 1, 2, 3, and 4. If the user picks option 3, the dialog moves on to the sub-level of branch 3 and shows the selection 3.1, 3.2, and 3.3.
Add a new dialog option to the first layer by selecting "First dialog layer" and clicking the [+] icon. Add a new dialog option to a sub-level by selecting the appropriate option on the parent layer and click the [+] icon.
Question and answer
In the panel below the dialog tree you add the actual dialog:
- Text of dialog part: The first text field on the left contains the line the PC will say when the user selects this option. Thus, it's also the line of text appearing in the dialog selection. You'll see that the text gets added to the dialog tree while you type it in.
- Answer to dialog part: The second text field contains the answer of the NPC.
- If you check the Alternative text for dialog part option, you'll get a third text field. Use this if you want the line appearing in the dialog selection to be different from what the PC actually says. For example, if the text spoken by the PC is too long to show it in the selection, you could put that long text in the third text field and keep a short version in the first one. You could also trick the user and let the PC say something completely different from what he picked (but don't do this too often; the second time it's not funny anymore).
Control the dialog
On the right side of the panel you can control how the dialog develops:
- Only show dialog part if condition/Value: These options allow you to enable/disable dialog parts based on a condition or a value. See the Conditions and Values page for more on this.
- Execute action: Dialogs are usually more complex than just one line of question followed by one line of answer again and again. Picking a dialog option could lead to a longer conversation between the two characters before getting to the next dialog selection. Items could be handed over in the course of the dialog, conditions could be switched etc. That's why you can add an action that gets executed after the NPC answered the PC's line. You could even skip the answer (second text box on the left) and add this text to the action as well. Or maybe the NPC doesn't say anything at all.
- Call action: Instead of setting up an action under "Execute action", you can call an action defined somwhere else in your project.
- Select how to move on with the dialog after the current part is through. If you choose to stay at same dialog level the user will either get the same dialog options as before or – if the current dialog part has a sub-level – this next level of dialog options is shown. If you choose to switch to previous dialog level the user will get the dialog options of the parent level. The third option is to exit dialog afterwards, which will end the dialog.
- Check the "delete dialog part entry" option, if you want the current dialog part to be played only once. If it's through, the user will not see this option again.
Start the dialog
You start a dialog via the "Start dialog/dialog-layer" action part. You don't have to start the dialog on the first level, but you can select one of the branches as well.
Dialog properties
There is a "Dialog properties" button above the list of dialogs. The only setting is the selection of the playable character who is starting this dialog. This is optional and is only needed if you have voiceover audio in your game and want to export the texts for the voice artists. The lines spoken by the PC are then assigned to the right character.
Comment sets
The user can apply each of the game commands to each of the scene objects, items and characters – in adventure games it's usually possible to at least look at everything and use everything. But it's time-consuming and difficult for the developer to add individual actions for all possible combinations of commands and objects. That's where the comment sets come into play.
A comment set is a list of fallback texts, assigned to a character (makes only sense for PCs). It may contain texts like: "I can't do that", "That doesn't work", or "No". The Visionaire player picks a random comment from the list whenever the user performs an operation for which no individual action is defined, and shows it. You can define comments for a specific Command or select "[empty]" to use the comment for all commands (see image).
Each character can have multiple comment sets for different moods or different stages of the game; you can change the current set via the "Change comment set" action part.
Assign interfaces
On the "Interfaces" tab you can assign interfaces to the character. Only these assigned interfaces are active and can be used when starting the game. Read more about this on the Interfaces page.
Interacting with the character
You can interact with an NPC just like you can interact with a scene object. Add actions to the character on the "Actions" tab, define their execution type and add action parts. Unlike for objects, you do not have to define an interaction area (hotspot) around the character. The Visionaire player will recognize the character by itself, taking transparent areas into account.
Components
tbd


