How To Create a Scene Within a Scene (h2)
| Name | By |
|---|---|
| Grid based scenes & interface based close-ups (images, interfaces, lua) | AFRLme |
This tutorial will teach you a couple of methods that you can use to bypass the 10 scene limitation of the evaluation version of Visionaire Studio - feel free to use it in the full version too, as it's a perfectly valid method for myst-likes, hidden object games, & visual novels.
Tutorial
Grid Based Scenes
A grid based scene is a single image comprised of multiple scene backgrounds stitched together.
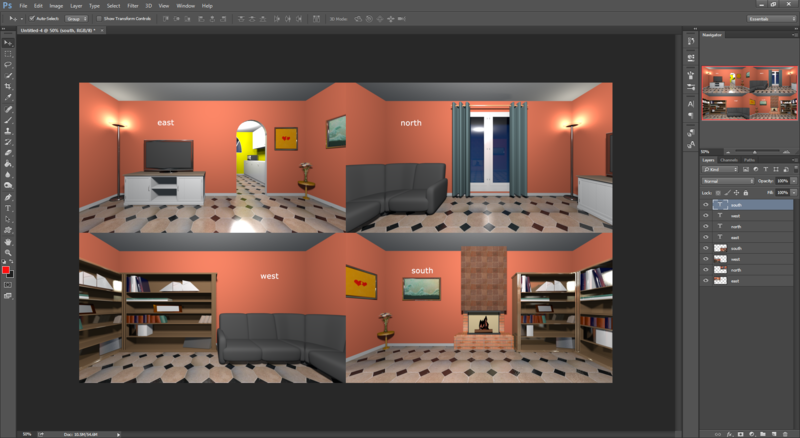
Right, I'm just going to assume that you already have a bunch of scene background images, so start off by opening up photoshop or whatever image editing software you use. Load up one of the scene backgrounds you have just created & then double the canvas width & height. Now copy in each of the other scenes & position them so that they all fit inside of the image, like in the screenshot below.
| Quick note #1: While it's possible to use the grid method for third person perspective games, it works best with first person perspective games, such as: myst-likes, hogs, & visual novels. |
| Quick note #2: Grid based scenes work best when the scene backgrounds are the same size as the default resolution of your game. You could technically create different sized scene backgrounds, but it will make things more complicated in the long run. |
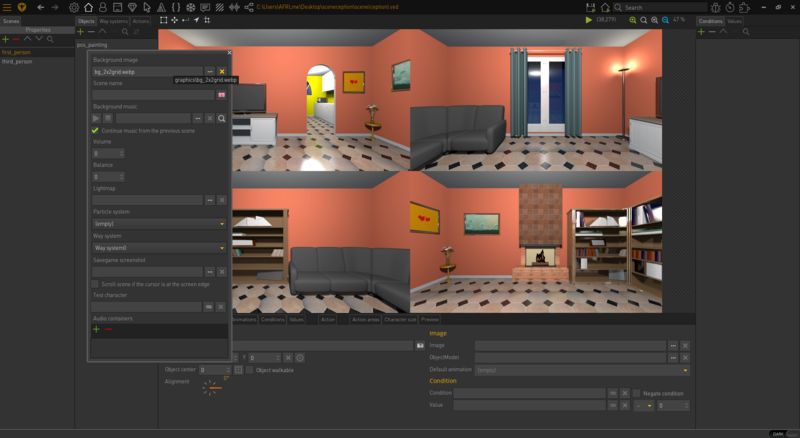
Now that you have created your grid based scene background image, you should create a scene in Visionaire Studio & import the image as the scene background via the scene properties.
Next create a new value under the scene values tab & name it grid_index. Set the default value to whichever number corresponds with the section of the grid background image you want to display first. Alternatively, you can use the string section of the value if you want to use names instead of numbers to refer to the different grid sections - I decided to use names, in the demo I provided.
Once you have done that, go to the scene actions tab & create a new called by other action, rename it to update_grid. Now create an execute a script action part inside of the called by other action you just created & add something along the lines of this to it... (choose the relevant script).
string based grid values
local grid = game.CurrentScene.SceneValues["grid_index"].String

if grid == "east" then -- grid 1 (top left)
 game.ScrollPosition = { x = 0, y = 0 }
elseif grid == "north" then -- grid 2 (top right)
 game.ScrollPosition = { x = 1281, y = 0 }
elseif grid == "west" then -- grid 3 (bottom left)
 game.ScrollPosition = { x = 0, y = 721 }
elseif grid == "south" then -- grid 4 (bottom right)
 game.ScrollPosition = { x = 1281, y = 721 }
end
number based grid values
local grid = game.CurrentScene.SceneValues["grid_index"].Int

if grid == 1 then -- grid 1 (top left)
 game.ScrollPosition = { x = 0, y = 0 }
elseif grid == 2 then -- grid 2 (top right)
 game.ScrollPosition = { x = 1281, y = 0 }
elseif grid == 2 then -- grid 3 (bottom left)
 game.ScrollPosition = { x = 0, y = 721 }
elseif grid == 2 then -- grid 4 (bottom right)
 game.ScrollPosition = { x = 1281, y = 721 }
end
The x & y values in the scripts above are based on a default game resolution of 1280x720. 4 images @ 1280x720 in a grid of 2x2 ='s 2560x1440. If you look closely at the values, you can see that I am offsetting the viewport camera (scrollposition) based on the top-left pixel of each image.
Resources
| Name | Description |
|---|---|
| sceneception.zip | A working .ved file, complete with resources. Check out the readme.txt file for instructions. |

