How To Create a Scene Within a Scene (h2)
| Name | By |
|---|---|
| Grid based scenes & interface based close-ups (images, interfaces, lua) | AFRLme |
This tutorial will teach you a couple of methods that you can use to bypass the 10 scene limitation of the evaluation version of Visionaire Studio, though you should feel free to use it in the full version too as it's a perfectly valid method for myst-like games & visual novels.
Tutorial
Grid Based Scenes
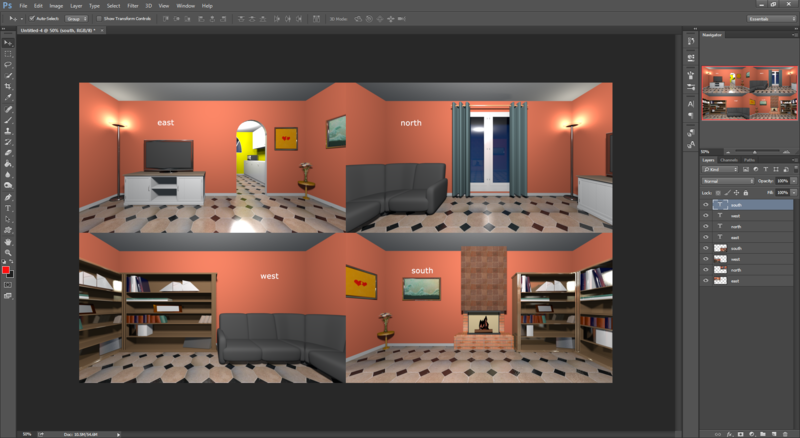
A grid based scene is a single image comprised of multiple scene backgrounds stitched together. Just think of it like this...
| image 1 | image 2 |
| image 3 | image 4 |
Anyway, once you have created your background scenes, you should open up photoshop or whatever you use. Load up one of the scene backgrounds you have just created & then double the canvas width & height. Now copy in each of the other scenes & position them so that they all fit inside of the image, like in the screenshot below.
| Quick note #1: While it's possible to use the grid method for third person perspective games, it works best with first person perspective games, such as: myst-likes, hogs, & visual novels. |
| Quick note #2: Grid based scenes work best when the scene backgrounds are the same size as the default resolution of your game. You could technically create different sized scene backgrounds, but it will make things more complicated in the long run. |
One of the first things I did was create a transparent image file the size of the default game resolution (1920x1080 in my case) & then I created a semi-transparent version of my default mouse cursor - you can create a custom cursor to indicate loading/inactive state if you prefer.
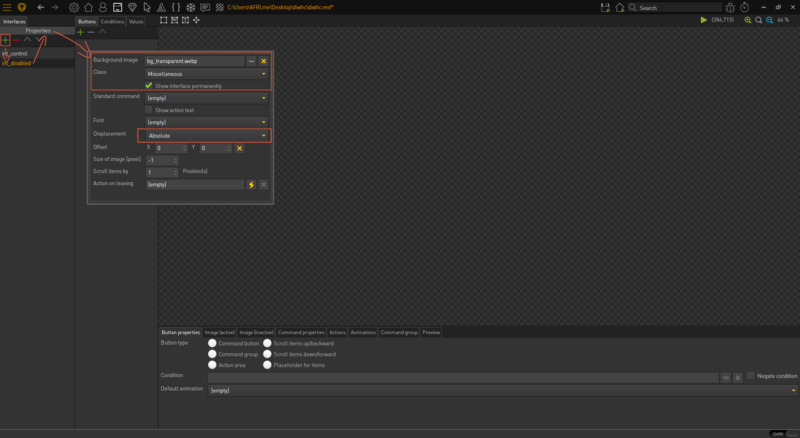
After you've done sorting out those images, open up the interface section of the editor & create a new interface. Now open up the properties for the interface & assign the image with the transparent background you created to the background image section. Tick the show interface permanently option & set displacement to absolute. Don't forget to set the class to something like miscellaneous. & that's it for that, you can now feel free to close the properties tab.
| Quick note #1: You may also want to create a temporary image the same size of your game default resolution with a solid color as it makes it easier to draw the interface area when you can see exactly what you are working with. |
| Quick note: #2: You can create custom classes for interfaces with the explorer tool (ctrl/⌘ + e). I think we need to create documentation for the explorer tool, sorry for the inconvenience. |
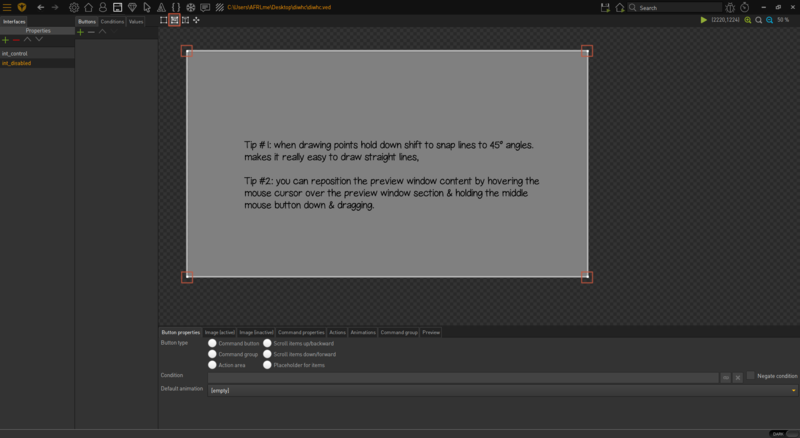
Next you will be wanting to select the create and edit interface area button & then draw around the outer edges of your interface background. It should be approx. the same size as your default game resolution or greater. I recommend you use a temporary background image with a solid color to make it easier to draw around - if you do, then don't forget to set it back to the transparent background after you have finished setting the interface area.
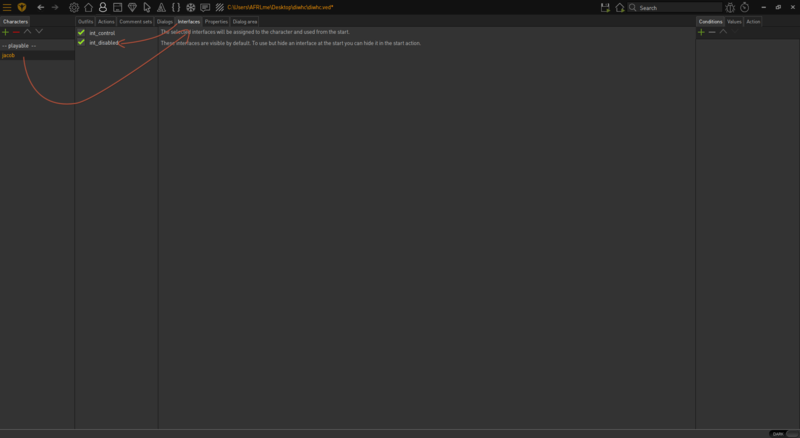
Now navigate over to the characters section of the editor, then navigate to the interfaces tab of your playable character & assign the new interface you have created to them otherwise it will not show up when the game is running.
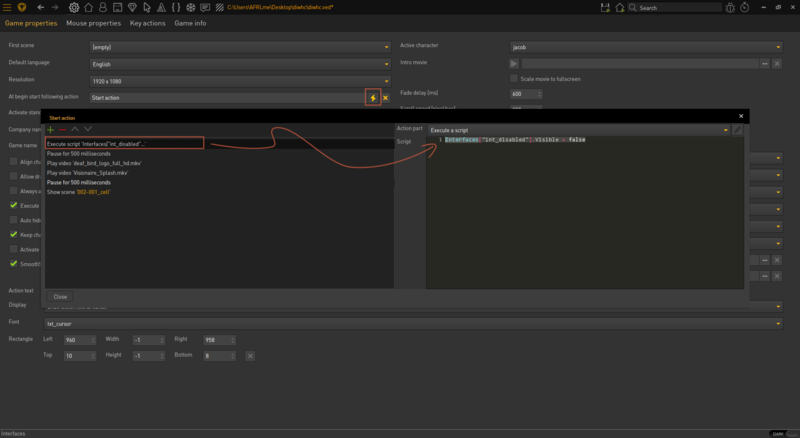
Now navigate over to the game properties tab (cog icon on the main menu) & create an execute a script action part for the at begin start following action containing something along the lines of...
Interfaces["example"].Visible = false -- change example to the name of the interface you created earlier.
Resources
| Name | Description |
|---|---|
| sceneception.zip | A working .ved file, complete with resources. Check out the readme.txt file for instructions. |
